
I don't hold to the notion that we're supposed to reserve certain foods for specific times of the year. If I want to eat hot soup during the summer, an ice cream sundae during a rainstorm, or roast a turkey in February, then I do.
Tamales often fall into the "for special occasions" category even though they're relatively easy to make. The time-consuming part stems from the quantity: you need a lot to serve a crowd and still have enough leftovers to send home with guests, as many Mexican families tend to do.
I often crave tamales. When that craving hits, I'll make a dozen or two, enough for dinner and lunch for my auntie and me, plus some to toss into the freezer for those mid-week meals when we want something warm and hearty with little fuss.

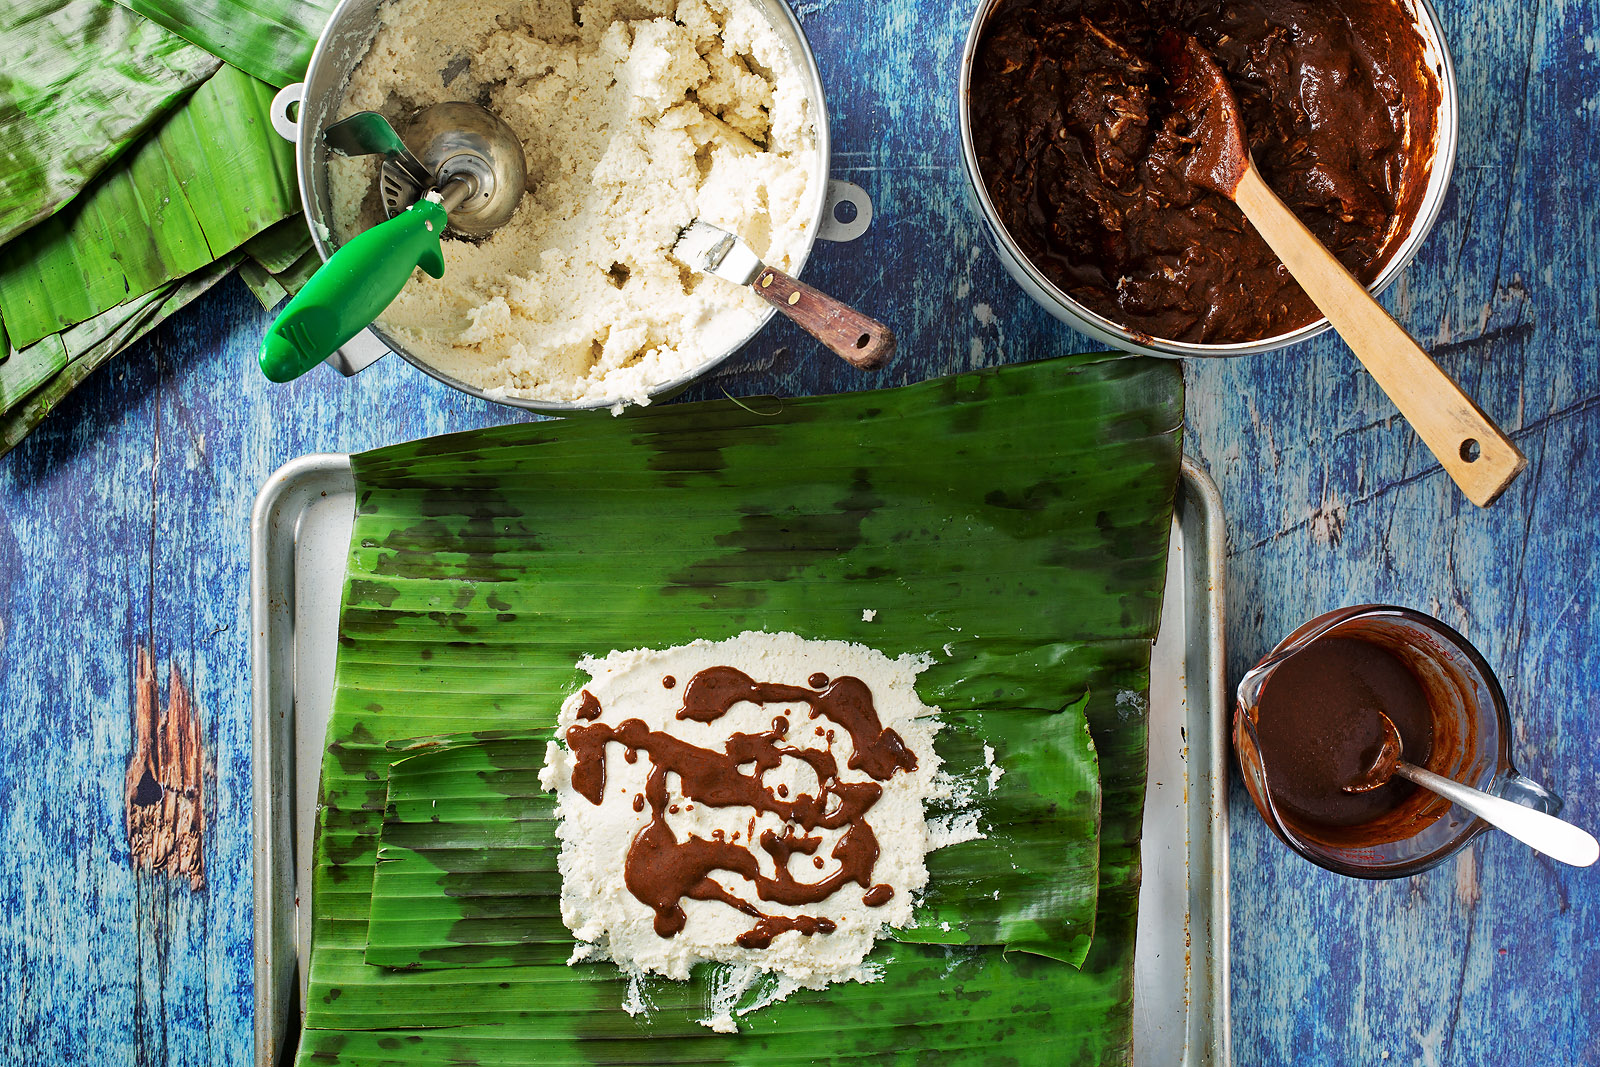
I photographed today's recipe for tamales back in 2020 when I posted my version of mole negro (pictured above). I had every intention of posting these in time for Christmas that year. However, I was already beginning to slow down from what I thought was pandemic exhaustion, but it turned out to be cancer. I'm happy to finally be sharing this recipe today.
What if I didn't make your mole negro?
If you didn't make the mole negro because all those ingredients intimidated you, or maybe you did make it, and you've gone through it all, not to worry. I have a convenient shortcut for you.

The 65-year-old Mexican brand, Doña Maria, makes mole paste that's available at most major supermarkets. This mole paste is not a finished sauce but a good base with all the chiles and spices in traditional Mexican mole. My mother used it throughout my childhood. I've enjoyed all their moles over the years.
The directions on the jar are basic: mix one part paste with two parts broth, creating a serviceable sauce. But most families add a few fresh ingredients to elevate it. It's still a straightforward, no-fuss way to make mole (and no, this is not a sponsored post).
Opening those pesky jars!
Most Mexican families collect the glasses these moles come in. We used them as water and juice glasses. They're lovely. But because they're usable drinking glasses, the lids don't screw on and can be difficult to pop off mess-free.
Doña Maria knows how much people struggle with these lids and have attempted to make it easier. The newer lids now have a three-point pattern that tells you where to apply the pressure to open them. The picture shows a bottle opener, and you're supposed to use it to pry loose the lid at each point. But not all bottle openers are created equal. The magnetic one on our refrigerator is the kind that punctures a can on one end and opens a bottle with the other. Unfortunately, it doesn't have a long enough tooth to grasp onto the underside of the lid, rendering it useless as a Doña Maria jar opener.
Rifling through our kitchen drawers, I found a vintage beer bottle opener that belonged to my grandparents. The wide triangle top and the long tooth at the triangle's tip make opening the jar a breeze. If you don't have a vintage opener, there's still another way to open these jars: a knife blade.
Don't freak out; it isn't a "scary, might wind up in the ER" affair. Just follow me here:
- Mark the jar lid's side at each of the three points indicated on the top of the lid.
- Fold a paper towel in half, place it on the counter, and turn the jar upside down onto the towel.
- Pry a steak knife between the lid and the jar at each of the three points you marked, wiggling the blade to pry the lid slightly away from the glass. Once you get to the third point, you'll hear a slight pop as the air escapes from the jar. Quickly flip the jar upright, using the towel to hold the lid in place.
- You can now pull the lid off. Be slow and methodical here, though, because that oil is to the rim and will spill everywhere if you jerk the jar even just slightly.
And by the way, writing these instructions took much longer than it will take you to open the jar this way, trust me.
It's open. Now what?
Doña Maria mole is a paste, and while it sits on the store shelves, the chile oil separates from the solids. People unfamiliar with using mole paste assume this indicates spoilage. It doesn't. It's perfectly normal (think natural peanut butter and its oil separation). Pour the oil into a blender and use a butter knife to run along the glass wall, prying the thick, dry paste free and dump that into the blender. Add half a cup of canned fire-roasted tomatoes, a quarter of a white onion, a fat clove of garlic, 2 cups of warmed (not hot) chicken broth, and ¼ cup of nut or seed butter (peanut, almond or tahini); puree until smooth. If using this mole for tamales, transfer the mixture to a bowl.
If you want to serve this mole over chicken and call it dinner:
- Heat a tablespoon of oil in a deep 5-quart soup pot.
- Once the oil is shimmering, pour in the mole.
- Add ½ cup of broth to the blender jar, swirling to loosen up any mole left behind, and add that to the pot.
- Simmer for 5 minutes, then add eight cooked chicken pieces to the pot (I love freshly poached thighs and legs, but you could also break down a whole rotisserie chicken into eight pieces).
- Turn the chicken to coat well.
- Simmer on low until heated thoroughly.
- Serve over rice.

Banana leaves set these tamales apart
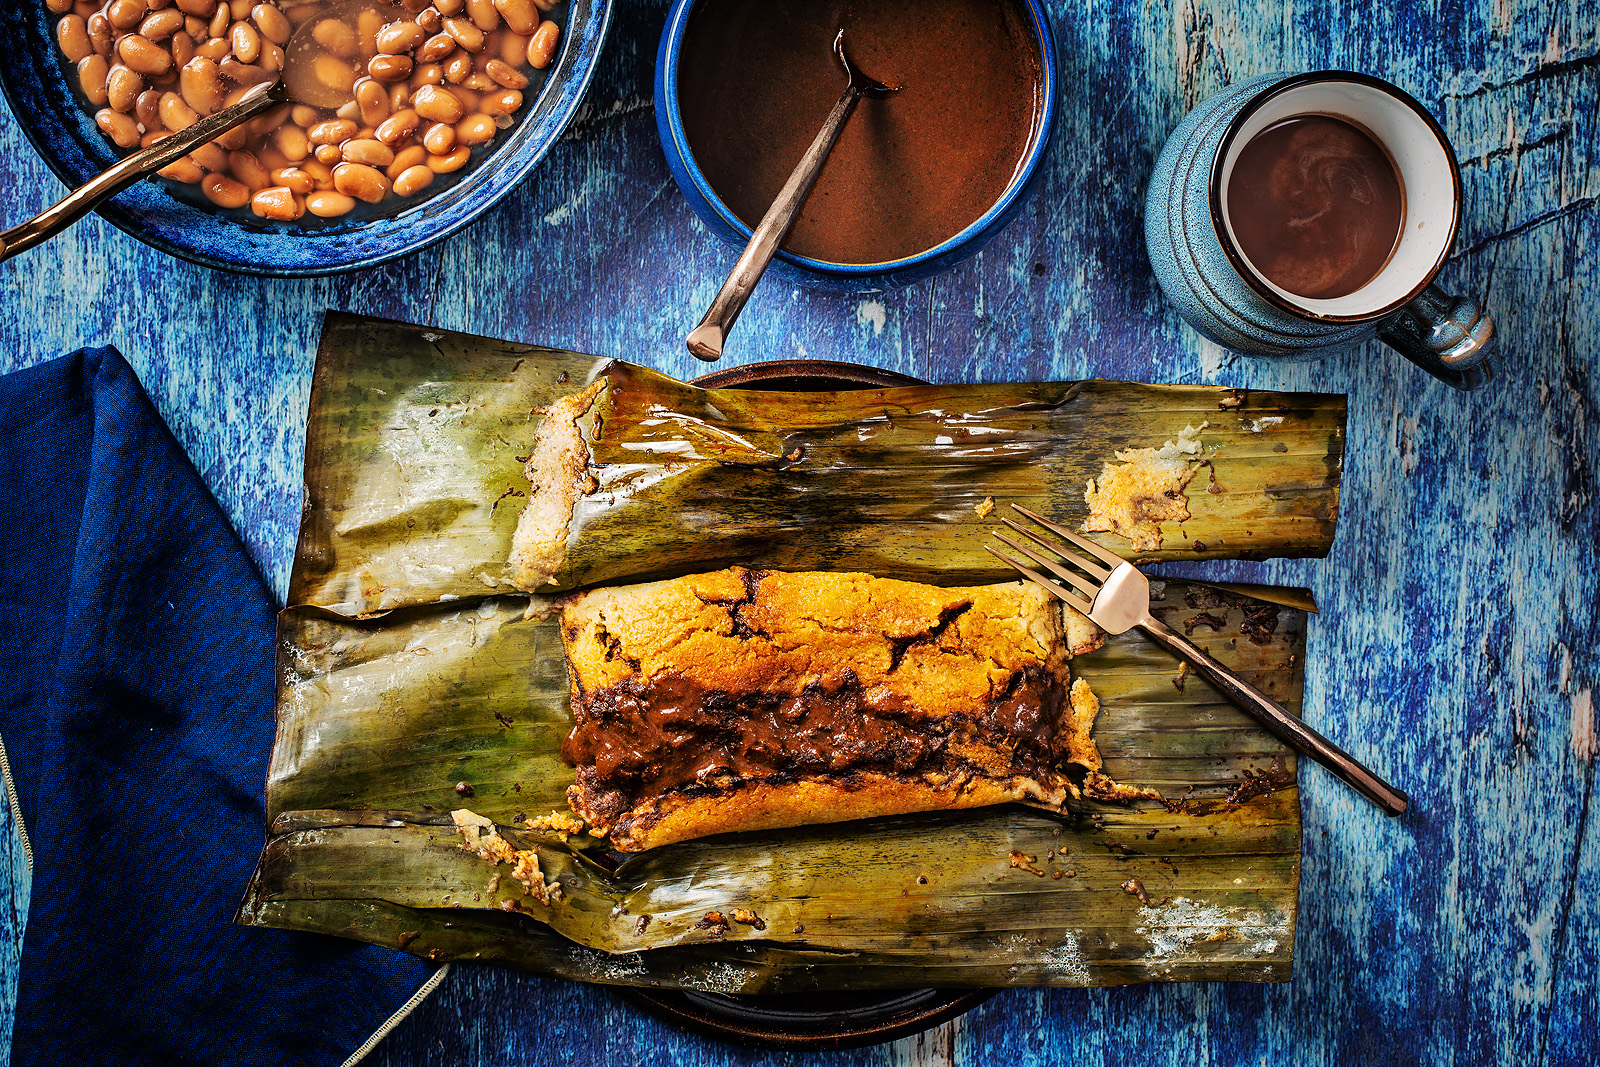
I wrapped these tamales in banana leaves, a typical wrapper in the southern states of Mexico. The big difference I've noted between banana-wrapped tamales and those in corn husks is texture: tamales are more moist when steamed in the less porous banana leaves, and the flavors are more concentrated than the same mole tamales steamed in corn husks. Personally, I'll take a tamal wrapped in either because, well, tamales.
Packages of whole fresh banana leaves are available in many Latin and Asian markets. I buy mine at Northgate Market, but you might also find them at grocery stores in areas with a large Latino population (I've seen them at Ralphs and Food4Less).
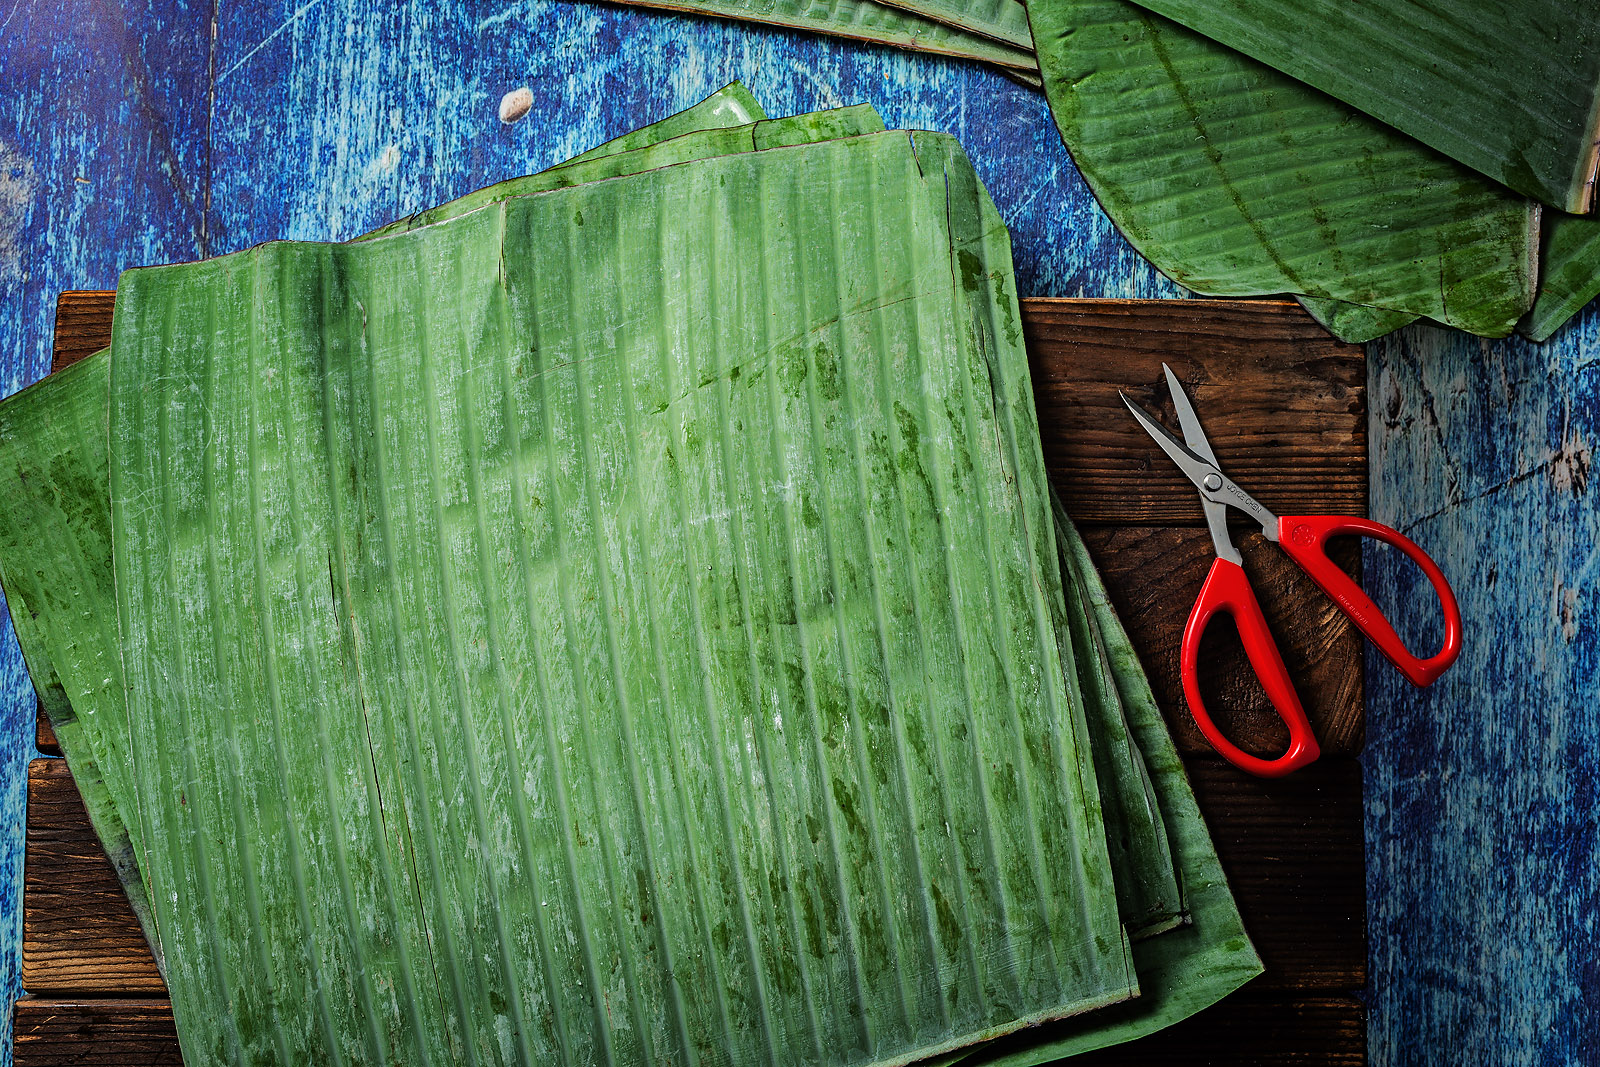
Banana leaves are stiff and need preparation to make them usable as wrappers. I trim off the tapered top as its pointed shape makes it challenging to use as a wrapper (save these; you'll need them to line the steamer pot). Then I cut them down into 6- to 8-inch segments (I typically can get four to five pieces from each leaf). Next, I use scissors to cut away the vein that's left on one side. Finally, I turn the stove on and pass the leaf over the grates. As it heats up, it will change color from dull green to bright green and become shiny. I keep the leaf moving as an area changes, so the entire surface is warmed and transformed. This simple technique makes the leaves pliable and easy to wrap around the filling.
How to make banana-leaf wrapped chicken mole tamales
These Tamales de Pollo con Mole en Hojas de Platano come together quickly, especially if you already have the mole paste on hand and use cooked chicken.
Let's get started:
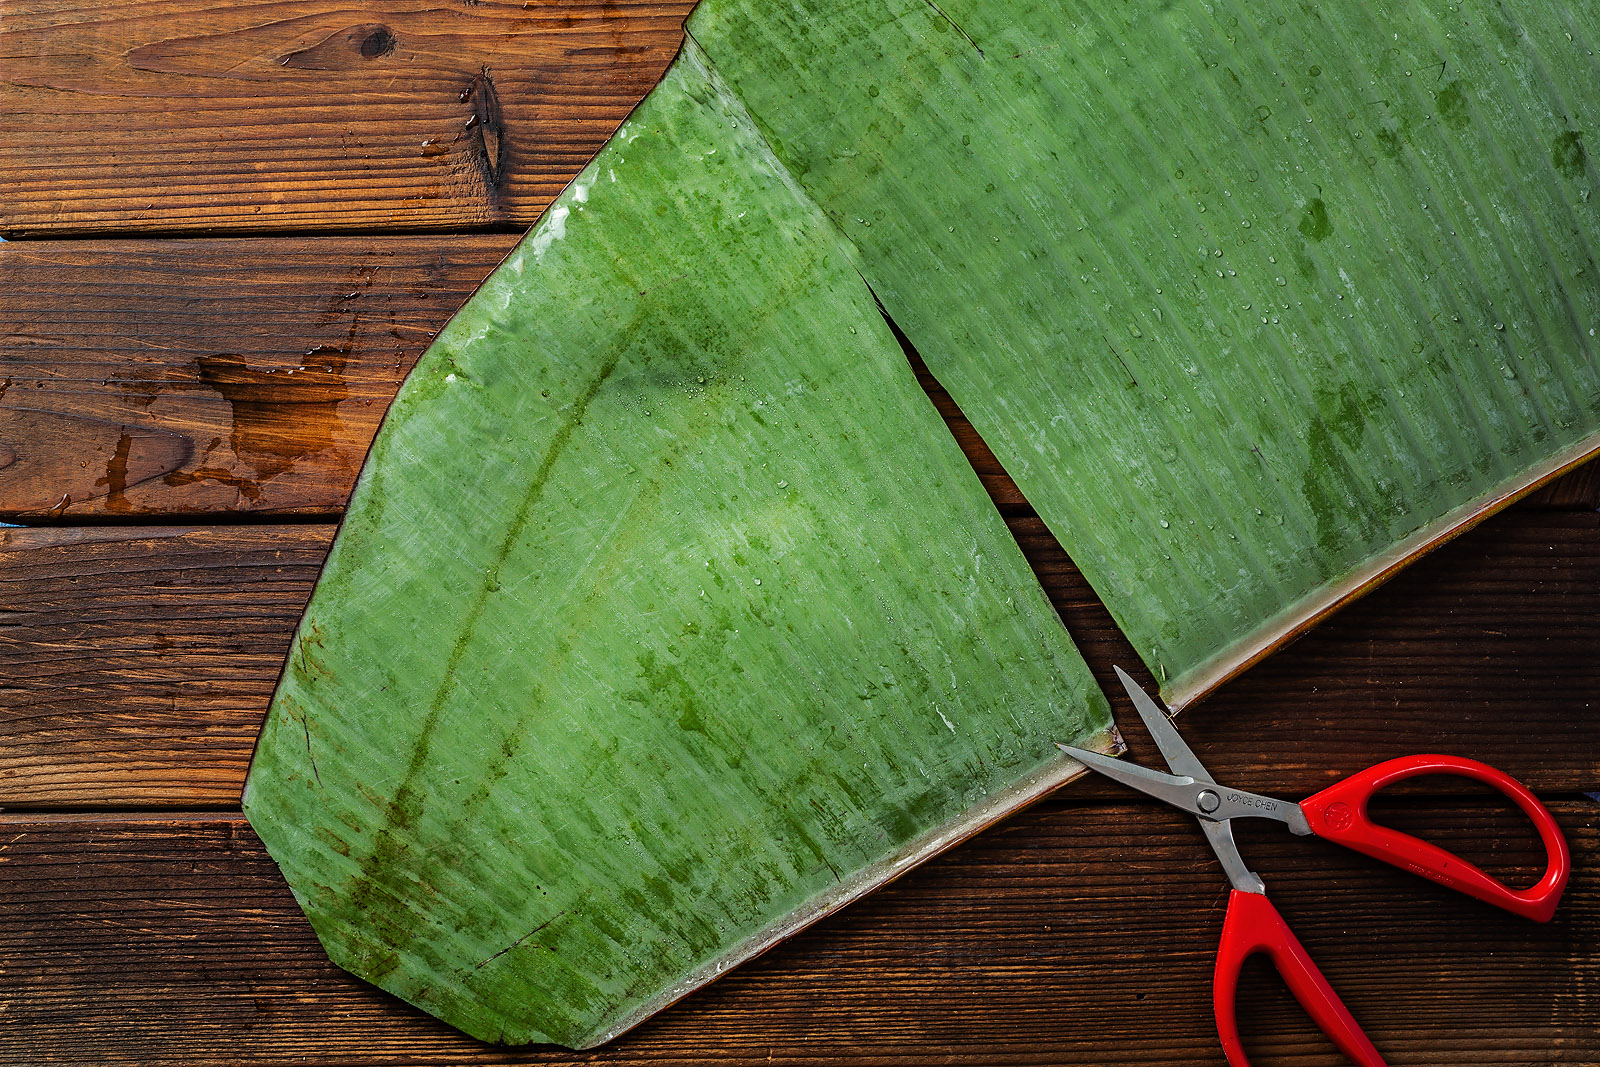
Depending on the brand, you should get two to three full-size leaf halves per package (the leaves are split down the center, with most of the center vein removed to make them foldable for packaging). Trim away the pointed, tapered end of each leaf. Save them to line the steamer with or to use torn into ribbons as ties for the tamales.

Turn on the stove and pass the leaf directly over the grates, moving it continuously to keep it from burning. Once the leaf has changed from dull green to bright, shiny green, remove it from the heat and repeat with the remaining segments.


Whisk together masa harina, baking powder and salt. Add the warm chicken stock and mix well with your hands.


Add room temperature lard to the bowl of a stand mixer. With the whisk attachment, whip the lard on medium until light and fluffy. This will take up to 15 to 18 minutes to get light and airy. Switch to the paddle attachment and add a quarter of the masa. Turn the mixer on to low and slowly work your way up to medium speed. Once it's fully incorporated, add the next quarter and repeat with low to medium speed. Continue in this manner until all the masa is incorporated into the lard, then continue beating for 10 to 15 minutes to aerate the masa. Cover the bowl with a damp towel and set it aside.


Reserve ½ cup of the mole and set it aside. To the bowl, add the shredded cooked chicken.

Mix until well combined.


Add water to the tamale steamer to just below the removable steam plate. Drop in a couple of clean pennies or dimes (more on why further down).

Use a left over leaf or two to line the bottom. Poke several holes with the tip of a knife to act as a vent for the steam to travel freely inside the pot.

Repeat layering, leaving the center open. Again, this better allows for steam to move around the pot, cooking the tamales at the top of the pile. Steam tamales for 1½ hours over medium-low. If the water evaporates before the cooking time is over, the coins you added to the bottom chamber will begin to rattle, letting you know that the water level is too low. If you do hear the rattling, pull a portion of the bottom leaf away from the wall and add 1 cup of hot water, slowly letting it drip down the side into the bottom chamber.

Serve with a side of frijoles de la olla (freshly cooked pinto beans) and a cup of champurrado (Mexican hot chocolate) or piping hot cafe de olla (spiced Mexican coffee).
Tamales de Pollo con Mole en Hojas de Platano
{Banana Leaf-Wrapped Chicken Mole Tamales}
Makes about a dozen
Ingredients
1 or 2 packages fresh banana leaves (leaves are cut at the main vein when packaged; you'll need at least 3 full-size halves for a dozen tamales)
For the masa:
4 cups masa harina (preferrable Masienda brand)
1 tablespoon baking powder
1 tablespoon kosher salt
3 cups warm chicken stock
1½ cups room temperature lard (preferable) or vegetable shortening
For the mole:
1 cup mole negro paste – get the recipe here, or use one 8.25-ounce jar of Doña Maria red mole (see note)
2¼ cups warmed chicken broth
To assemble:
4 cups shredded cooked chicken
Special equipment: Tamale pot with a steamer insert or an 8- to 10-quart pot with a deep steamer basket
Directions
Prepare the leaves: Cut off the tapered end (about 4 inches). Divide each leaf into four equal segments (approximately 6- to 8-inch each). Trim off the hard vein. Rinse the leaves well under cool running water. Turn on the stove. Lay a leaf on the grates, continuously moving it around as it changes color. When the entire segment has turned bright green, remove it and repeat with the rest. Set the leaves aside.
Make the masa: Whisk the masa harina, baking powder and salt until well combined. Add the stock, hand mixing and kneading until a ball forms. Cover with a damp cloth. Add the lard to the bowl of a stand mixer. Using the whisk attachment, whip the lard on medium-high until it's light and fluffy, about 15 minutes. Change to the paddle attachment. Add a quarter of the masa and mix, starting on low and working your way up to medium speed. Once it's thoroughly combined, add the next quarter. Continue, beating well after each addition. Once you've combined all the masa with the lard, continue to beat on medium speed for 10 minutes. Place a damp cloth over the bowl; set it aside.
Make the filling: Add the homemade mole negro paste and warm broth to a large bowl and whisk until you reach a smooth consistency (see note if using Doña Maria). Reserve ½ cup of mole and set aside. Add the shredded chicken to the mole bowl, mixing well.
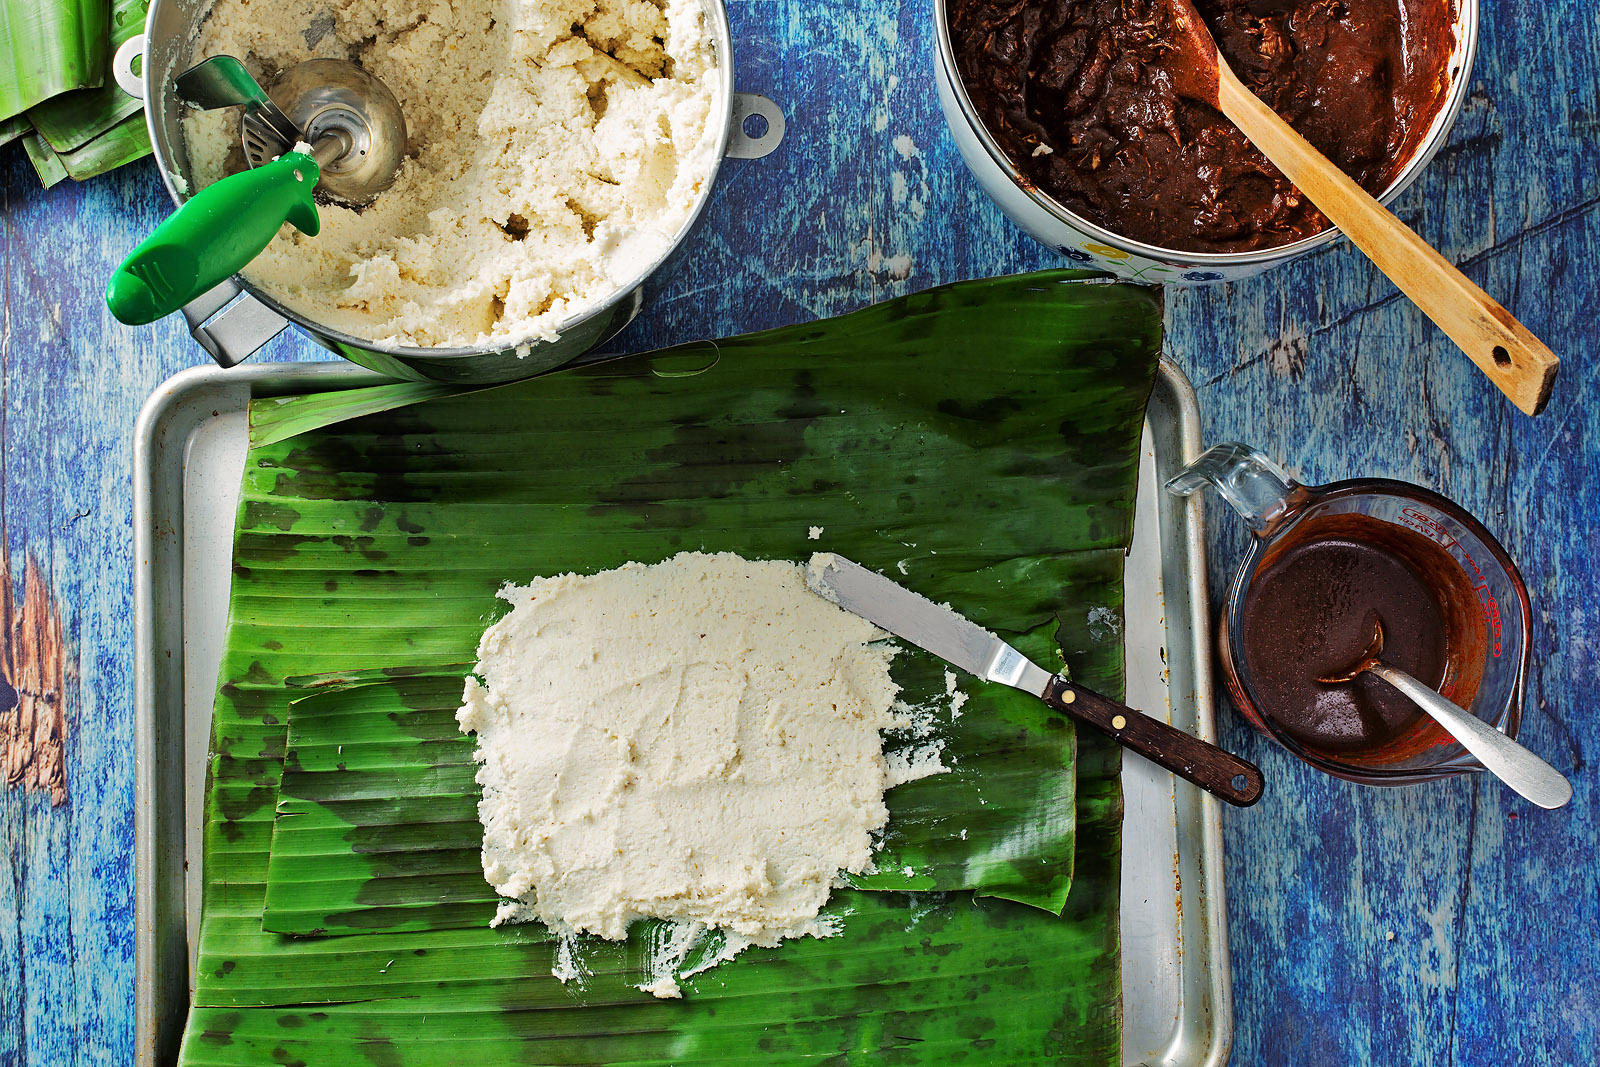
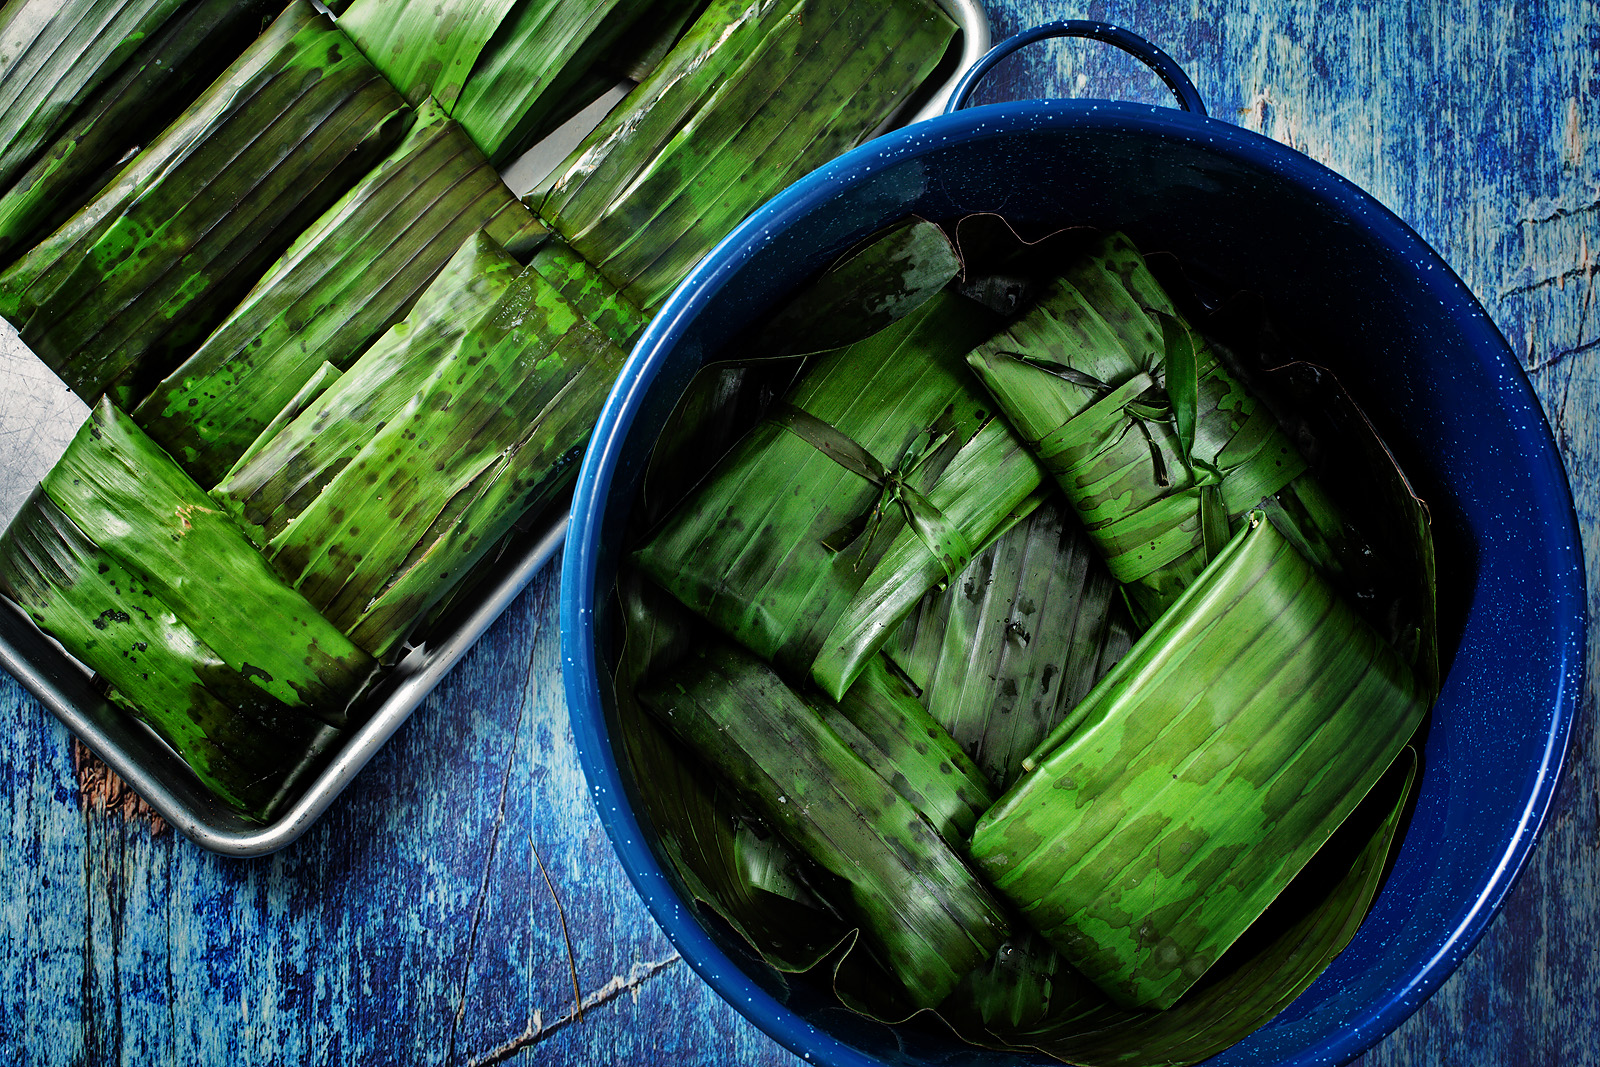
Assemble the tamales: Lay a leaf segment on work surface with the lines running horizontally. Spread two generous tablespoons of masa in the center in a 5- to 6-inch square and about ⅛-inch thick. Drizzle some of the reserved mole over the masa. Add 2 generous tablespoons of the chicken to the center. Pull the top of the leaf over the center towards you. Take the long edge closest to you and fold it back over the center. Gently massage the filling towards the center on both ends, fold one end over towards the center, and then repeat with the other end, creating a tight package. Remove to a tray, seam side down. Repeat until you run out of leaves or masa.
Steam the tamales: Fill the pot with water up to just below the steam plate of a tamale pot or the steam basket of a standard steamer pot. Drop two clean pennies into the pot before inserting the steam plate or basket. Use one of the tapered leaf segments to line the bottom of the steamer. To allow steam and liquid to pass through, use a paring knife to poke several random holes into the leaf. Lay the first layer of tamales on the bottom, following the contours of the pot, leaving the center open. Continue to layer the tamales on top of each, leaving the center open (this allows the steam to move freely, cooking the tamales at the top). Cover with a tight-fitting lid. Steam tamales for 1½ hours over medium-low heat.
If you hear the pennies rattle, water is too low. Using pair of long tongs, reach down to the bottom leaf and gently pry a side away from the wall of the pot to clear a path for adding more water. Slowly pour a cup of hot water down the wall, lay the bottom leaf flat again, recover and continue steaming. After 1½ hours, remove one tamal. Let it sit for 10 minutes. Carefully open; the tamales are ready if the masa pulls gently away from the leaf and looks moist but not overly wet and raw. If it seems overly damp or even still raw, refold the leaf and return to the pot, cooking for 20 to 30 minutes longer.
Serve tamales drizzled with the reserved warmed mole and a side of beans. Mexican hot chocolate is a traditional accompaniment.
Store completely cooled tamales in the refrigerator for up to a week or freeze for up to a year.
Note: If using Doña Maria, add it to a blender with the same amount of stock indicated above. Add ½ cup canned fire-roasted tomatoes, a quarter of an onion, a large clove of garlic and ¼ cup of either peanut butter, almond butter or tahini. Puree until completely smooth. It should be the consistency of a thick gravy.
Until next time, friends…
¡Buen Provecho!
xo, ani
More tamales recipes:

Easy Vegan Soyrizo and Potato Tamales with Adobo

Vegan Mushroom Tamales with Green Mole

Yum! I'm book-marking this for later. I recently made Cochinita Pibil using banana leaves from Northgate!
ReplyDeleteThank you. Cochinita Pibil is next on my list!
DeleteI want to make all of these! 😛
ReplyDeleteLove this. Thank you!.
Delete